Week 3 of Me-Made May had me looking quite blue! I know there's a lot of blue, white and gray in my closet, but this week really showed me how much I reach for those colors. I'll blame it on the rainy May we've had so far, although it looks like the weather may be finally turning around!And I have a ton of blue-hued fabrics in the stash...oh well, I guess I should stick with what works! At least I know I'll wear it.Here's the past week's MMMay recap:[BestWordpressGallery id="1" gal_title="MMMay Week 3"] This past weekend I unearthed a box of UFOs...unfinished objects. An ominous phrase in sewing. I have several piece that need just a few touches before they're wearable again. Hopefully this week I can find some time to dedicate to these unloved pieces.A lovely package (the details of which will be shared later) came from L.A. Finch Fabrics. Their selection is so lovely, and from what I can tell, their fabrics are very high-quality. Can't wait to dig into my new fabrics!Unfortunately, I had to do some practical sewing this past weekend...new cushions for a super cool mid-century modern chair frame. It still had the original cushions on it and I've been saying for literally two years that I'm going to redo the cushions. Brad, in typical Brad fashion, found some foam (he still won't tell me where) and batting, so this weekend's project was to finally make new cushions. It took several hours of intense sewing (and a few choice words if I'm being honest) but we got it done! Now I can do some fun stuff. I'll share before and after photos later this week, as well as our process.
pattern
DIY Flowing Blouse with Open Straps
Today I bring you a tutorial on how to take an existing shirt, create a pattern from it, and stitch it up. The most time consuming piece of this shirt was creating the bias tape. Basically, it's quite simple.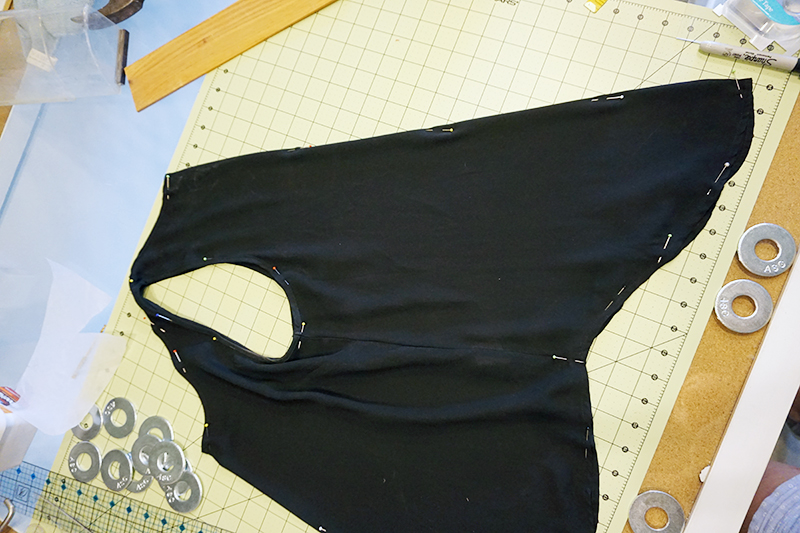 First, you take a woven shirt that you like the fit of. Pin the back and front together on the center folds, pinning the armholes together as well. Place tracing paper over the shirt and trace around the outline, slightly shaping the side seam.
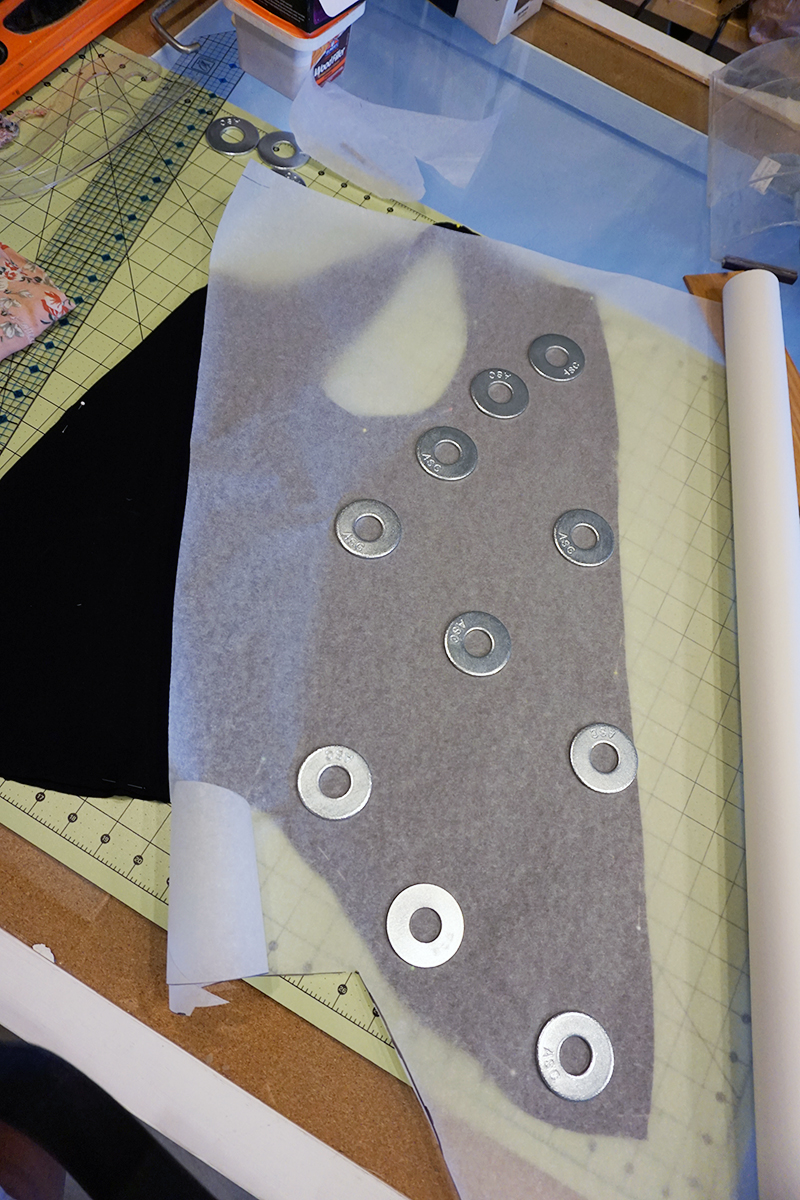
 Label the pattern piece with all relevant info and mark your seam allowances (I used 5/8"). Shorten the length of the straps so that you can use bias tape later to create them.
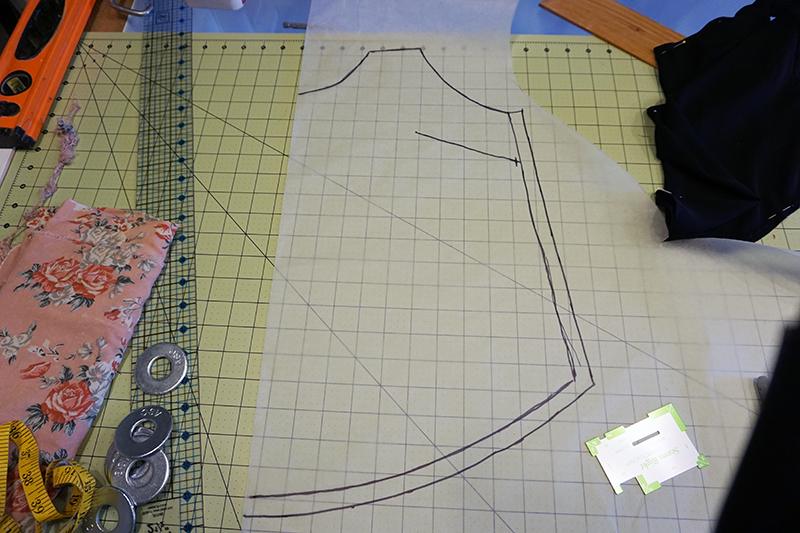 Trace the front piece and include any darts.
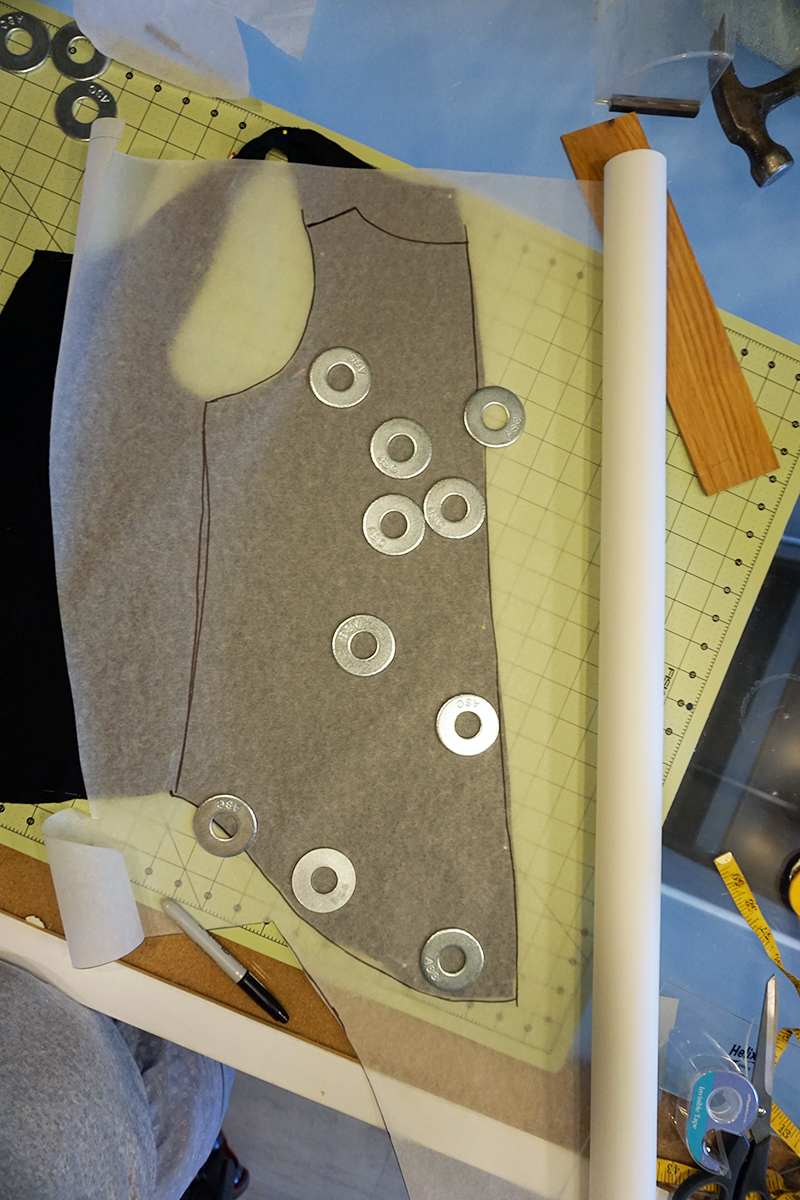
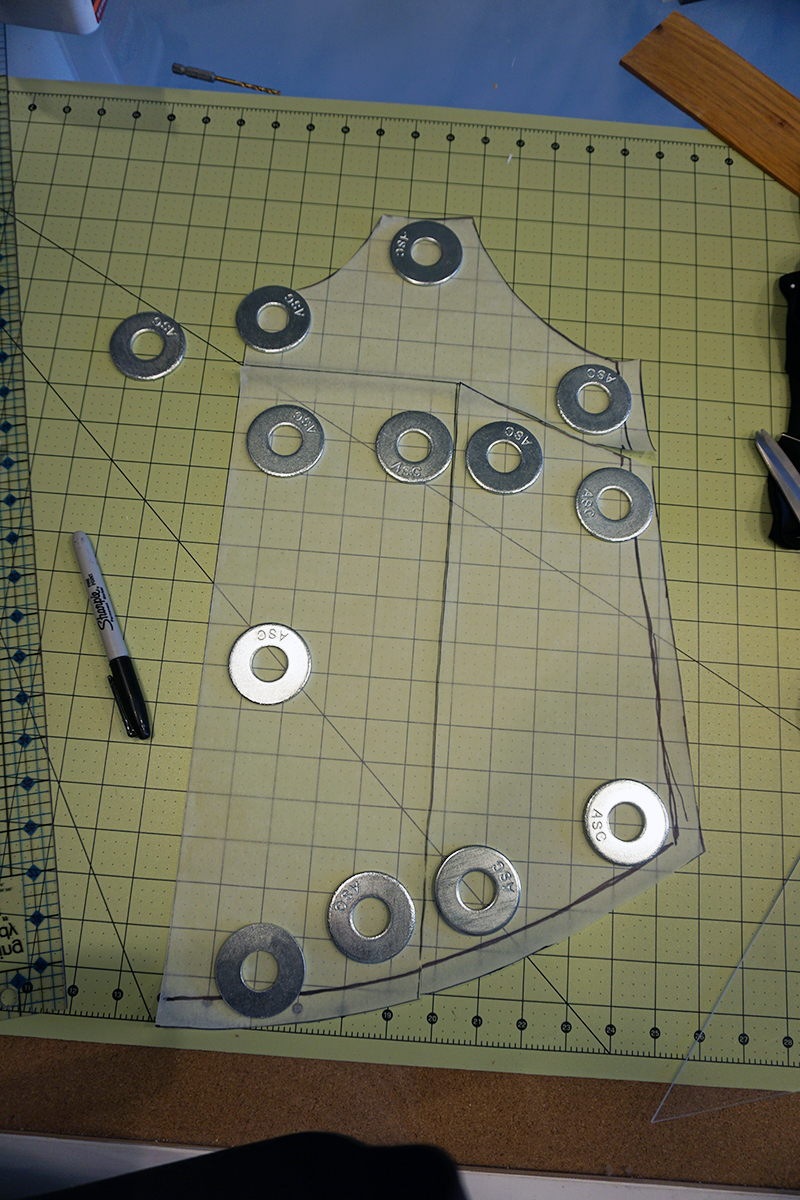 Mark a line from the dart point to the bottom of the shirt and from the dart point over to the center front. Cut these lines, including the dart.
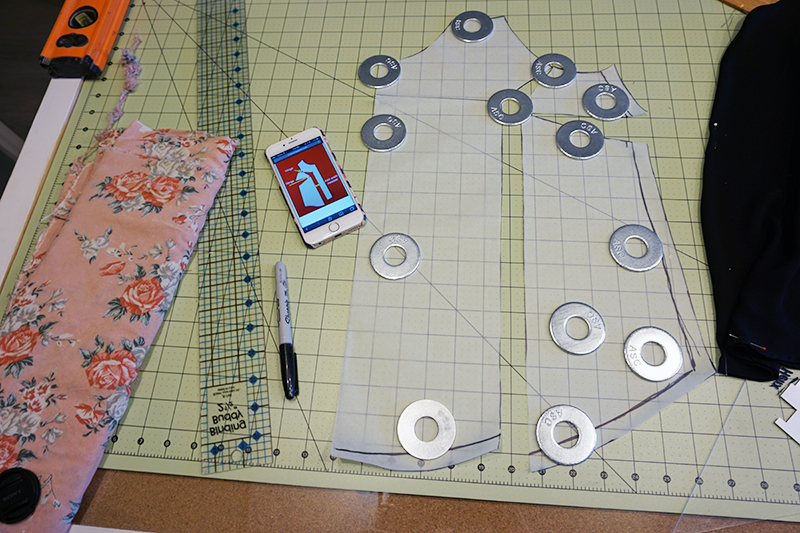 Measure the dart in the shirt to see how far you need to spread the dart. If the dart is 1/2" on either side of the fold you will need to spread it 1". Spread the dart so that you have the right measurement.
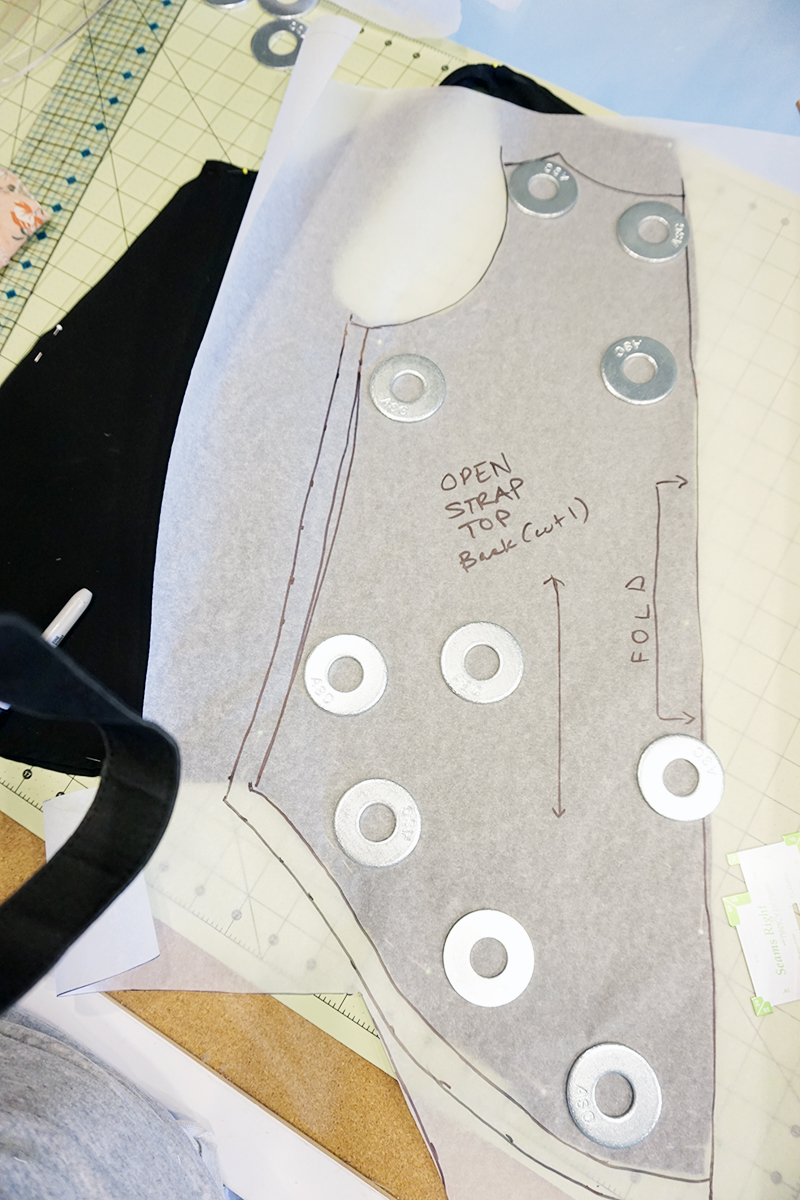
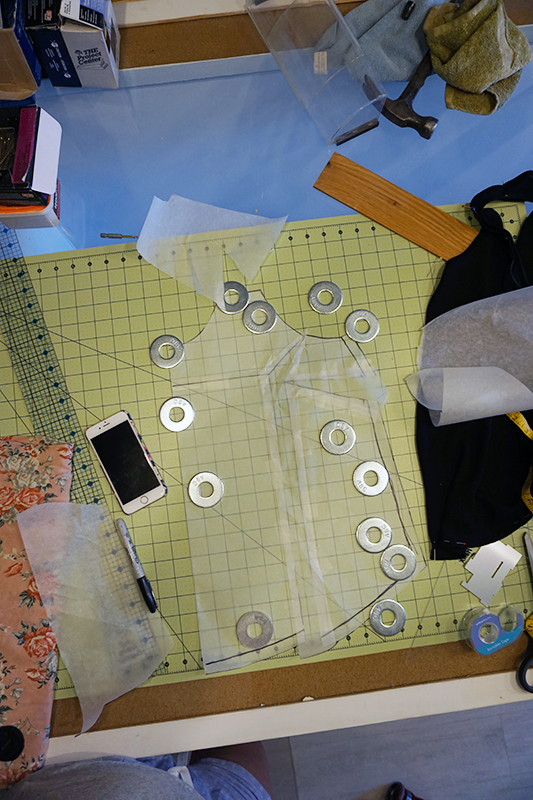 Slide paper under the cut pieces, tape everything together and re-draw the bottom hem lines and sleeve line.
 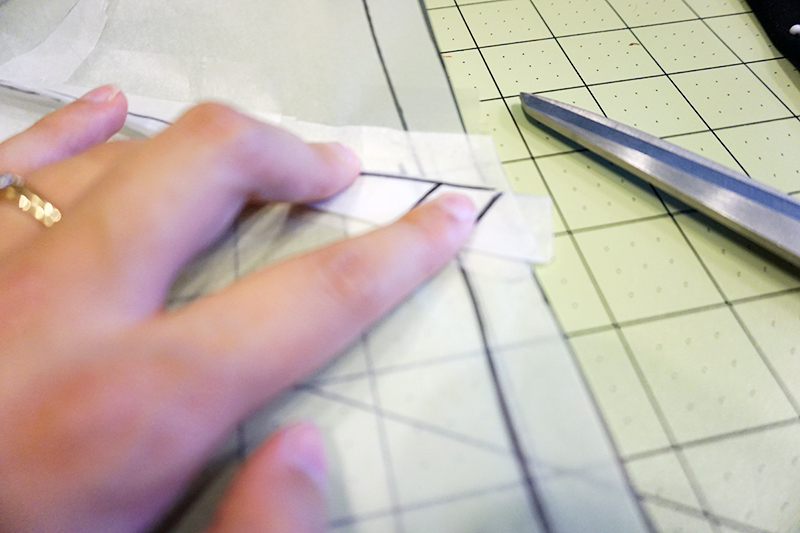 Fold the dart to mark the seam lines (ignore my mistake lines).
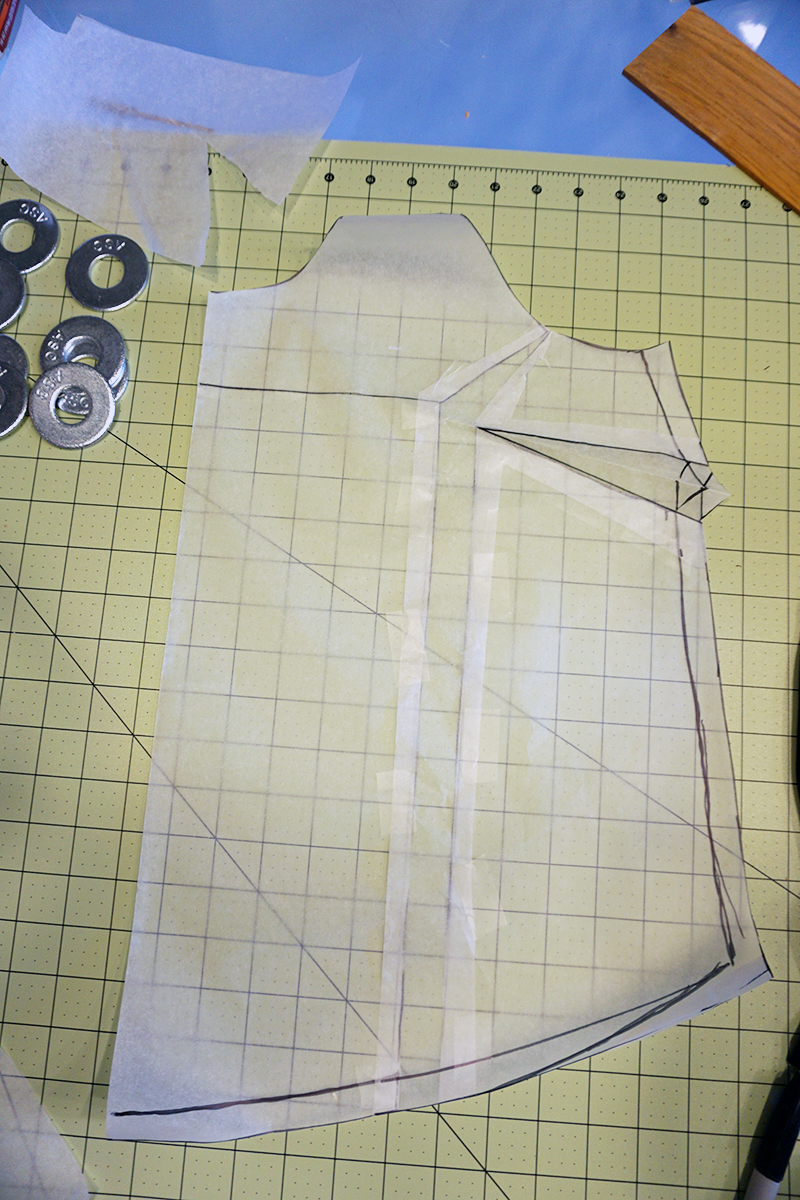 Ta-da! You have a front shirt piece. Cut all of the excess paper off.
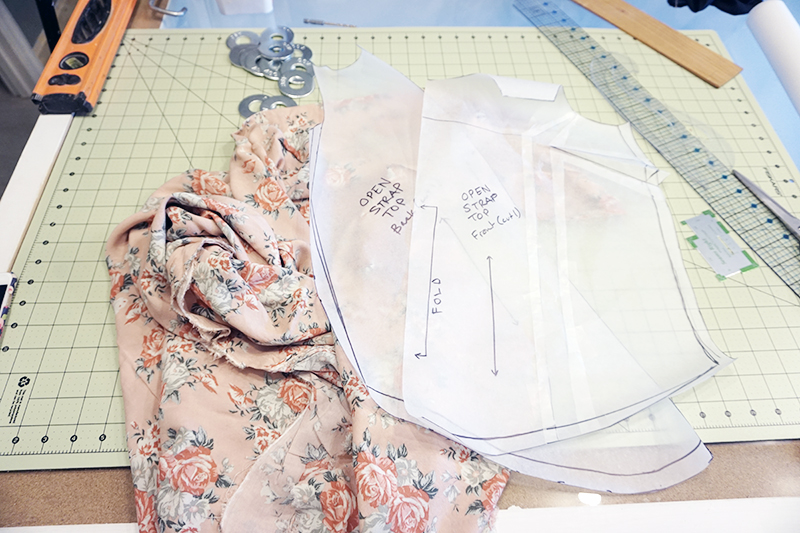 You should only have two pieces for this pattern, a front and back. They will both be cut on the fold.
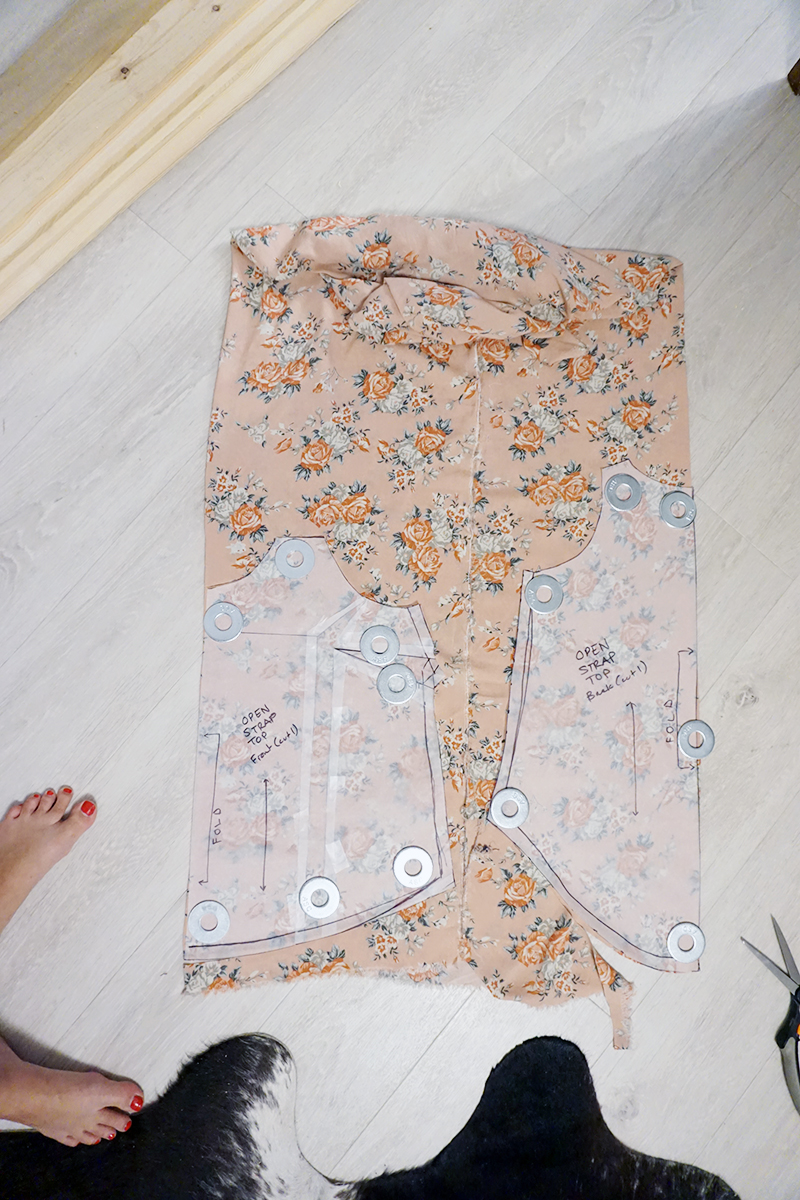 In order to cut both pieces on the fold, bring the selvedge edges to the center of the fabric and lay out your pattern pieces.
 Make some bias tape. I made a ton using this tutorial: http://whip-stitch.com/continuous-bias-tape-tutorial/
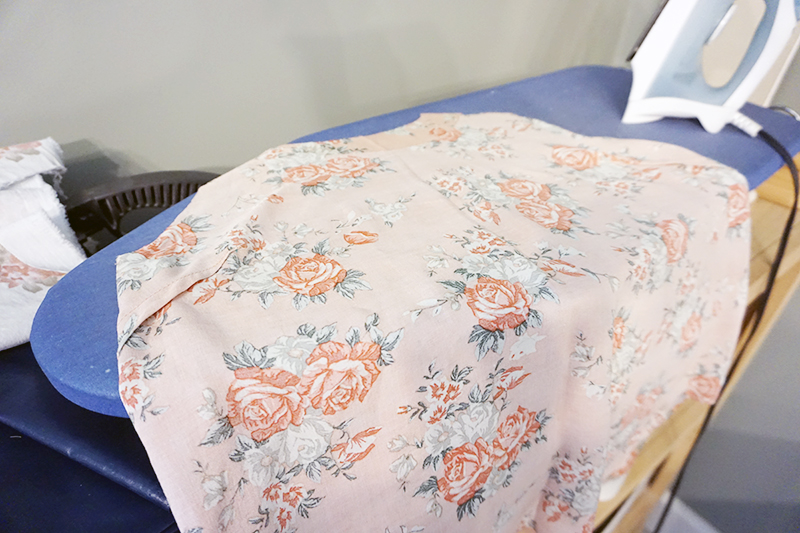 Sew the front and back pieces together at the side seams. I used french seams.
 Pin and sew bias tape across the tops of the straps.
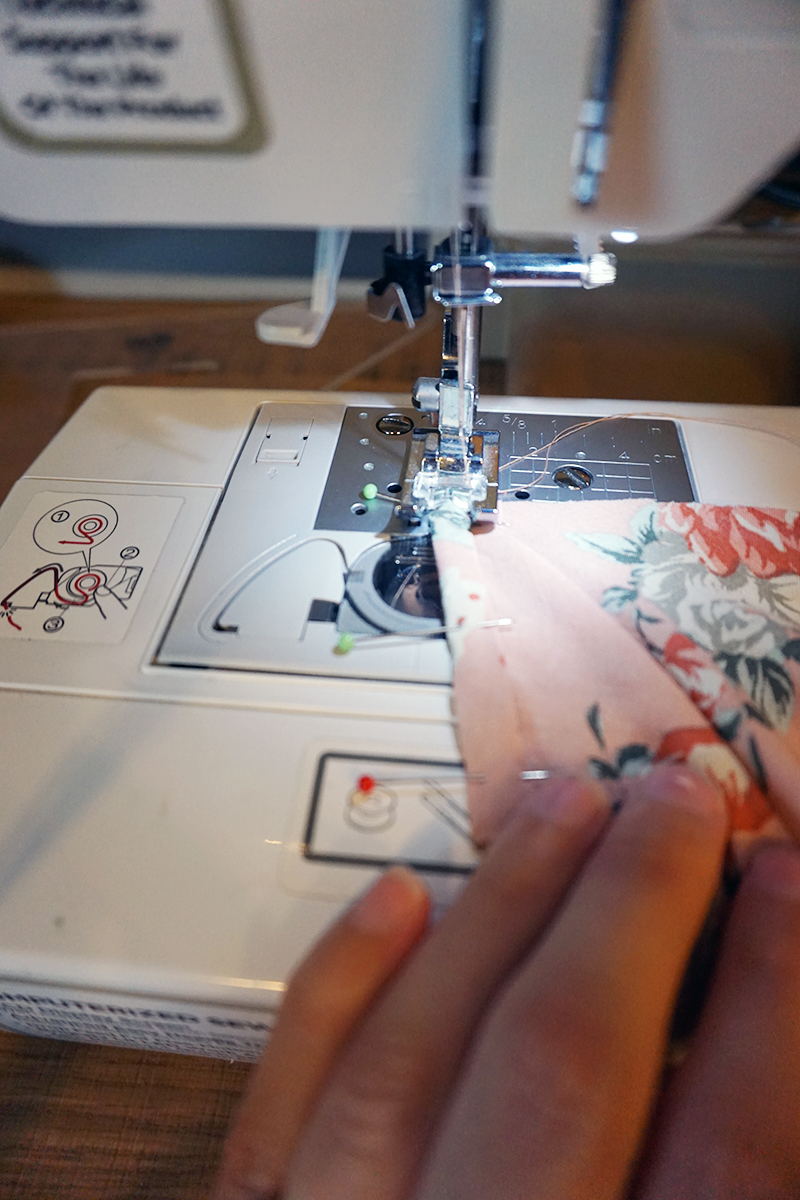 Stitch bias tape around the whole neckline and back, using your original shirt as a guide for the length,
 Stitch bias tape around each armhole, again using your original shirt as a guide for length. Hem, using a narrow hem or bias tape.
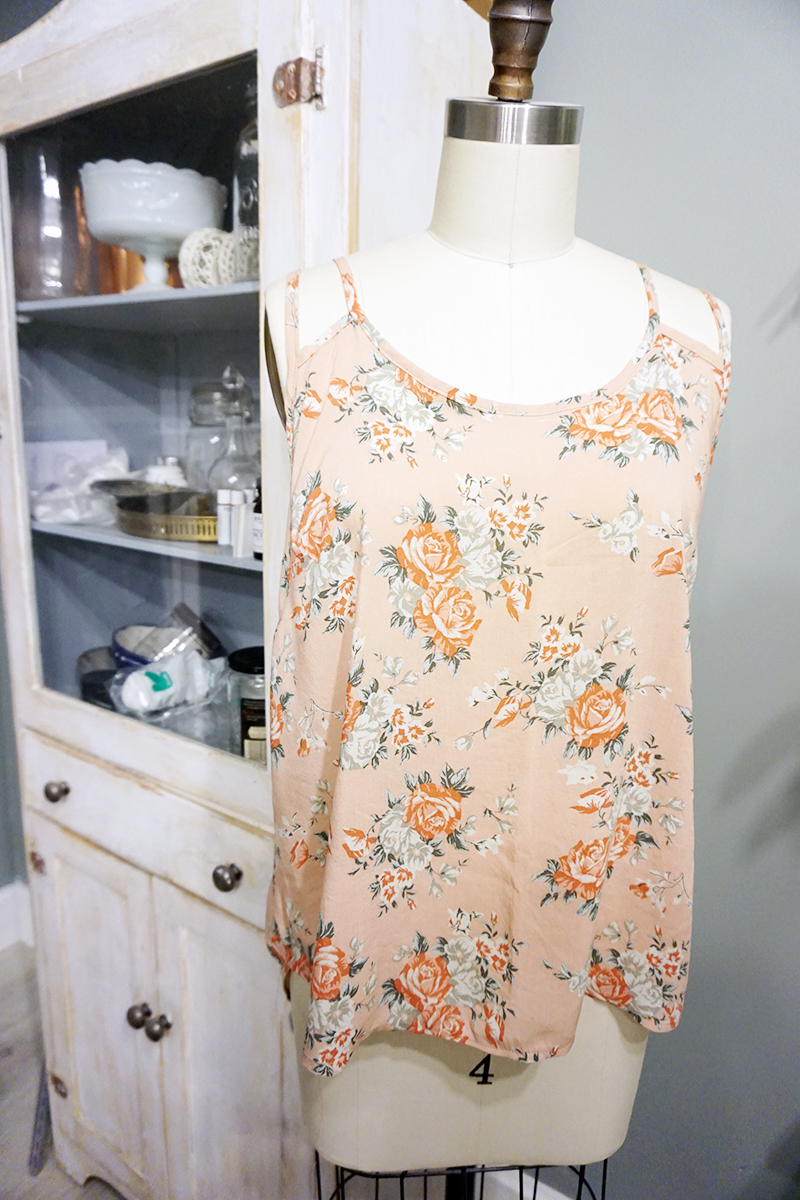 Your flowy, open-strapped tank is done!
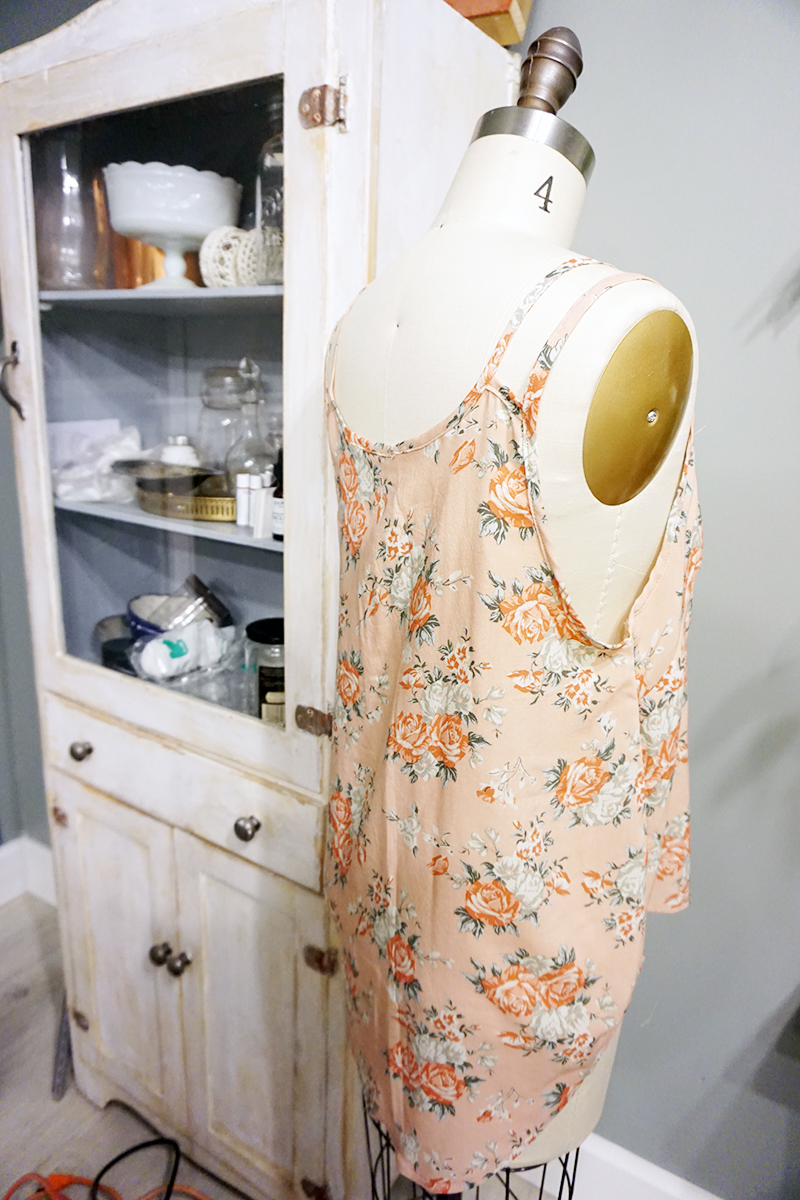
First Pair of Ginger Jeans
I bought my first indie sewing patterns from Sewaholic and Closet Case Files a few weeks ago. The one I am probably most excited about is the Ginger Jeans pattern. I've never seen such a nice-looking skinny jeans pattern made for curvier ladies and it even comes with two versions (high-waisted skinnies and low-waisted stovepipes).After researching other people's makes and reading through the sew-a-long multiple times I felt ready to move forward with making my first pair of jeans out of some weird floral stretchy denim ($2 a yard!).I have to say, I am most pleased with how neat and clean my front fly turned out. My topstitching actually turned out pretty nice, too, although I just used regular thread for these practice jeans. I didn't use any rivets or even a jeans button, opting instead to use two regular buttons.Unfortunately the fit really wasn't working for me, so I had to make quite a few adjustments. Based on my measurements I cut a size 12, grading to 14 at the hip and back to 12 for the waistband. I ended up taking a wedge out of the back yoke, stitching four 1/2" darts in the waistband, taking in the sides at the hips by almost 1 1/2" and the fit still wasn't right. So I took in the inseam at the crotch by about 1 1/2" and flattened out the front crotch curve. I probably should have left the crotch alone and instead taken in the waist even more because they went from high-waisted to about 1/2" below my belly button. I also tapered the calf area by about 1 - 1/2" from the knee on either side.Luckily, I had basted the seams, so I was able to adjust the fitting quite a bit. I'm not sure if it was my fabric choice (the denim is very lightweight and pretty stretchy) but the size I cut just overall seemed way too big. I have some heavier stretch denim (that I used for Brad's apron) and hopefully it will work better.The adjustments I plan on making to the next pair are: cut a straight size 12, make a swayback adjustment to the yoke and waistband, place the zipper a little closer to the fly, shorten pocket length and I may omit the pocket stays. I like the idea of pocket stays but I don't like that I can actually see the bottom of the stays through the pants fabric. There are definitely some issues with the jeans but they were great practice for several new techniques and I feel like I have a better understanding of how to fit pants.Disclaimer: If you keep scrolling you will see my half-baked attempts to photograph myself, awkward facial expressions, gratuitous booty shots and at least one awkward crotch shot. Scroll at your own peril.[responsive]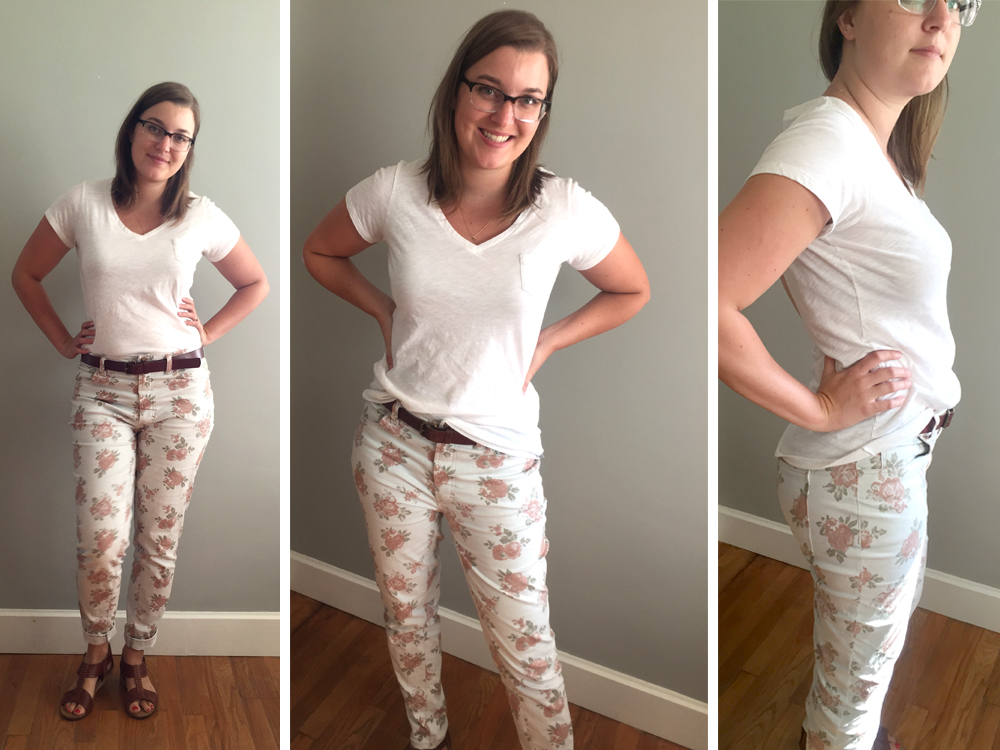 [/responsive][responsive]
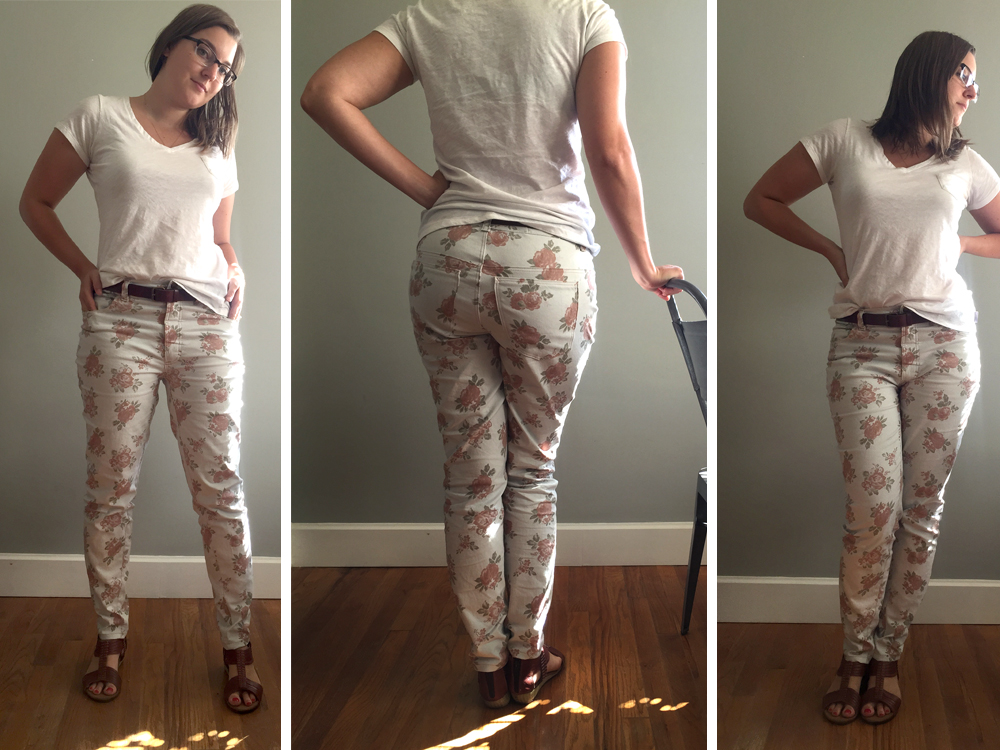 [/responsive][responsive]
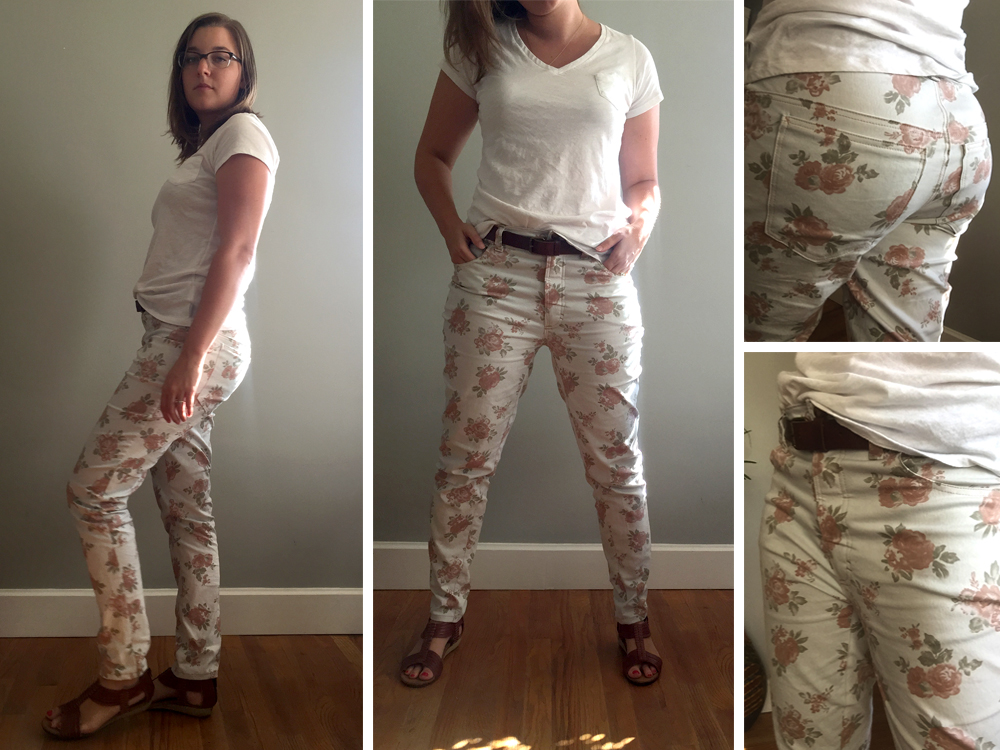 [/responsive]
6 Free Patterns to Download
in Design
[responsive]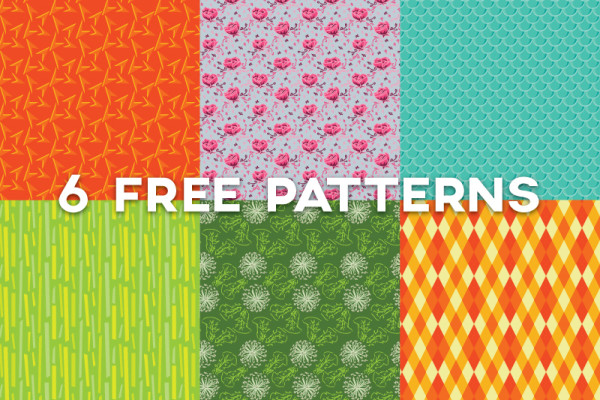 [/responsive]After being totally inspired by seeing Amy Butler's beautiful textile designs I decided to try to create a few during the holidays. They somehow turned out a little retro with a 60s flair and I'm pretty pleased with how they look. The file is available for download at the bottom of this post. It is a .eps vector file and the patterns are repeatable. The file also includes pattern swatches. Enjoy![responsive]
 [/responsive][responsive]
 [/responsive][responsive]
 [/responsive][responsive]
 [/responsive][responsive]
 [/responsive][responsive]
 [/responsive]Download Link (18mb file)
DIY Summer Dress - With Tutorial!
Hi! After a long hiatus I have decided to revamp the blog and start posting again. So...enjoy!I present to you a super comfortable and simple diy summer dress. And it only takes two yards of fabric! This dress was made with a polyester print fabric (which was so not fun to work with, but it's pretty, so I'm good with that) and one invisible zipper inserted in the side of the garment. I used a 22" one, but ended up trimming quite a bit off of it. I finished the hem with lace hem tape which makes the boring task of hemming kind of fun and gives it a bit more weight, important for such a lightweight fabric. Also, I used a 1/2" seam allowance. The dress consists of 4 pattern pieces: the bodice (with two neckline variations), the skirt panel, the waistband and the straps.
 The bodice pattern piece looks more confusing than it really is. Just use common sense. Cut a bodice piece of each neckline (on the fold) out of your outer and lining fabrics. You should have four bodice pieces. Then cut a long skinny piece for the straps. I made mine about 2" wide x 30" long.
 Then cut your two skirt panels and 2 waistband pieces.
The Bodice:
To start, sew together the outer bodice pieces on the right side. Sew the lining pieces together on the left side. Do the same on the opposite side, only stitch about 3" down (to leave room for the zipper). Then, with right sides together, sew down the long side of the strap piece. Pull the end through to turn the strap right-side-out. I use one of these.With outer and lining fabric right sides together, sew the arm holes and neckline, leaving the strap section open. Try on the bodice and figure out how long you want your straps to be (+1" for seam allowance). Cut two straps out of the long tube you made. Iron them flat. With bodice pieces still right sides together, thread the straps through the strap openings, being careful not the twist them. Pin and stitch in place, meeting the seams you made on either side for the arm hole and neckline. Turn bodice right side out. Stitch two lines of gathering stitches around the bottom of the bodice, keeping the edges even. Gather the bottom so that it matches your waistband length.