I'm a little sad to be ending this great challenge of wearing one handmade article of clothing each day. It's been so inspiring to see what others have made and to recap the (larger than I thought) collection of items that I've made. The experience of wearing my own clothes has helped me figure out ways to grow and become a better seamstress. It's made me realize some of my pitfalls, helped me figure out what styles and fabrics I like best, and where the gaps in my me-made wardrobe are.Also that I like to wear blue. Like, a lot. Maaaybe I should branch out more? But, then again, I know I'll wear it if it's blue...Here's a quick photo recap of the last week and a half's outfits:[BestWordpressGallery id="4" gal_title="MMMay Week 4"]I have a ton of dresses and a few solid skirt options, but my trousers and shirt options are very limited. I also don't have any me-made sweaters (except for that one in the back of my closet that's never seen the light of day because I ran out of yarn and had to get more and you can clearly see where the new yarn starts and it drives me crazy...)I guess my challenge for the next 2 months is not to buy any more fabric and to repair my makes that need some help. I've already fixed two dresses and a shirt, so it's a start!Oh, and one other awesome thing about wearing/making your own clothes is that it helps you limit RTW clothing purchases. Kind of hard to justify buying something if you could make it cheaper and better. Although, I did just buy a pair of jean shorts. They were only $10, ok?? And I've already worn them three times! And jorts are haaard. Although, I can't make my own shoes (yet) so I still can't help but buy those. I'm working on it.
fabric
L.A. Finch Fabrics Review
Someone I follow on Instagram recently posted a photo of some new fabrics that they got via a company called L.A. Finch Fabrics. I, of course, had to look into it to find out where these amazing fabrics had come from. Turns out that they have a gorgeous selection of apparel fabrics that would be difficult to find at most fabric stores. I did end up purchasing several yards of fabric to try out. Mostly rayon challis, ponte knit and one silk (my first silk purchase!).Here's a quick look at the new items: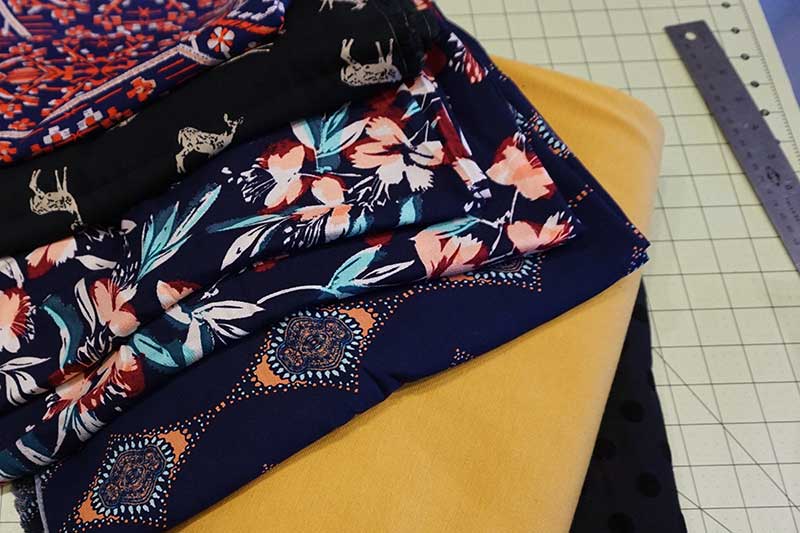 Not only did they send the fabrics, they also included a huge stack of samples, 6 tiny coconut buttons, a good-sized length of black lace ribbon and several twill tape scraps which they used to bundle the fabric. There was, unfortunately, an issue with the gorgeous floral rayon. I ordered two yards of it to make a dress and they sent me two separate yards of it. Obviously, that wouldn't work for making a dress.I emailed them and told them about the issue. The immediately gave me a refund for the floral fabric and asked if I'd like two yards of a different rayon since the floral had a dye issue. I looked through their site and nothing really stood out so I just asked for two more yards of the floral, weird dye or no.All in all I was disappointed that it happened in the first place but they handled the issue quickly and above and beyond my expectations. I will definitely continue shopping here because I'd like to support a smaller fabric company vs. JoAnn fabrics. Still, though, how does that even happen? Oh well.Here are the fabrics I bought draped on a form to show off the print/weight:
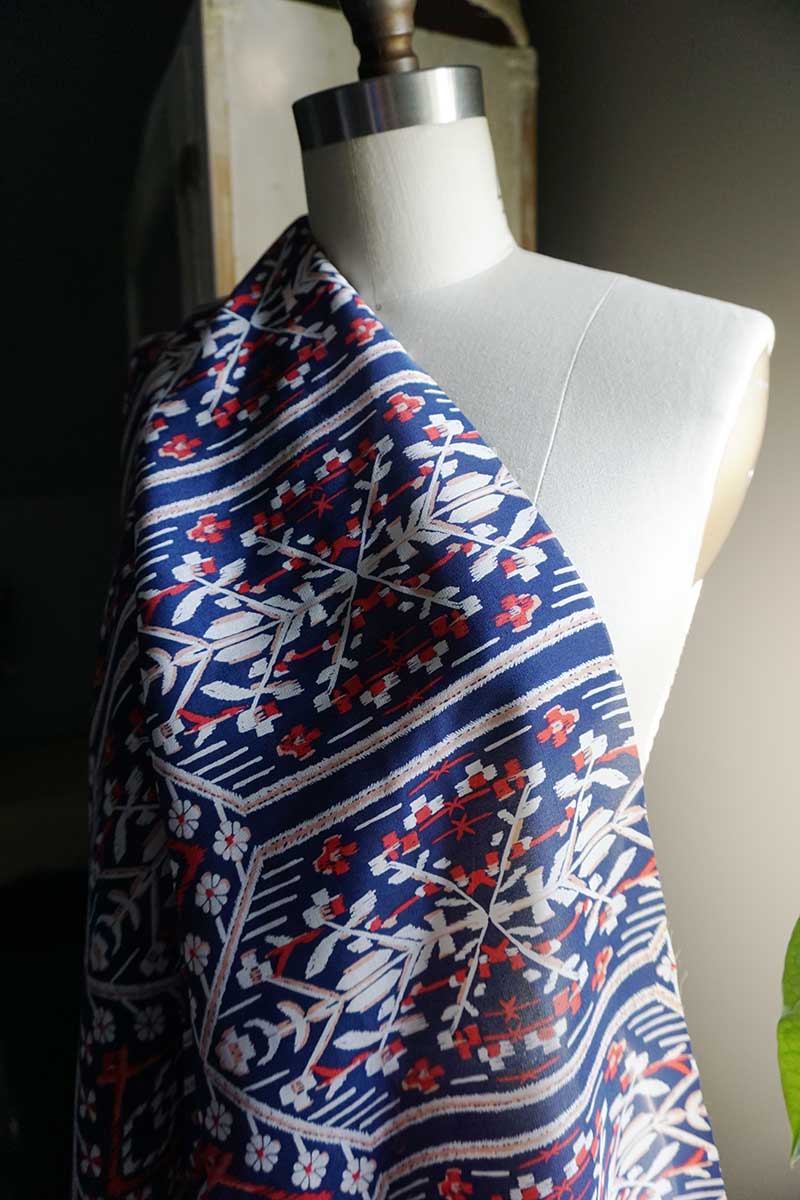 [Bohemian Vista Red Printed Silk]
 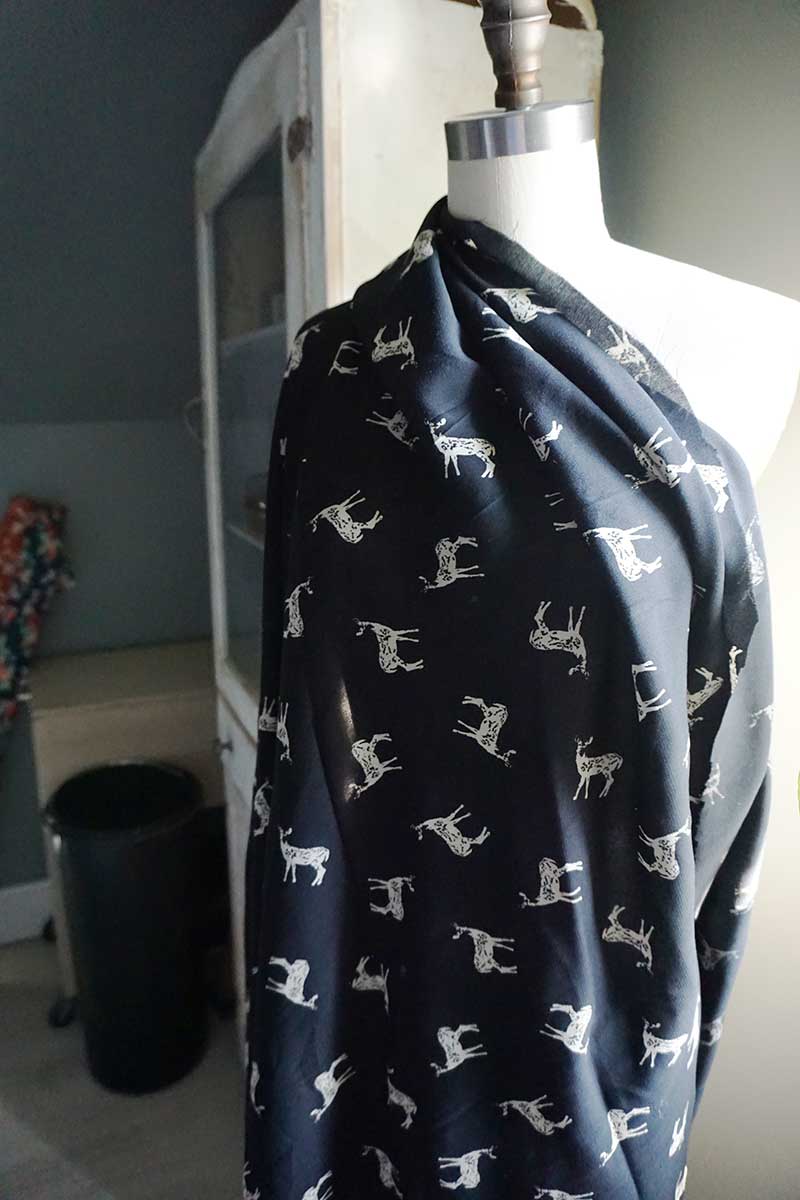 [Rayon Deer Printed Woven]
 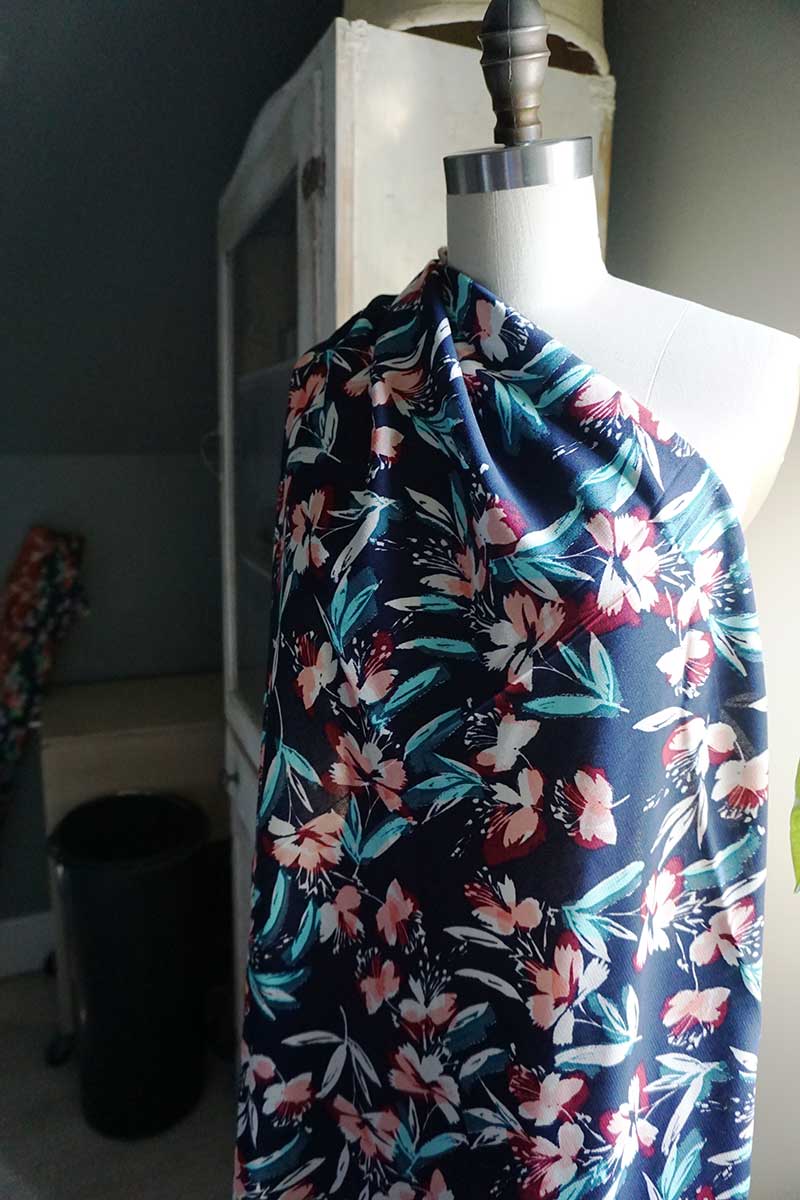 [Helena Floral Rayon]
  [Ruthie Printed Rayon Challis]
 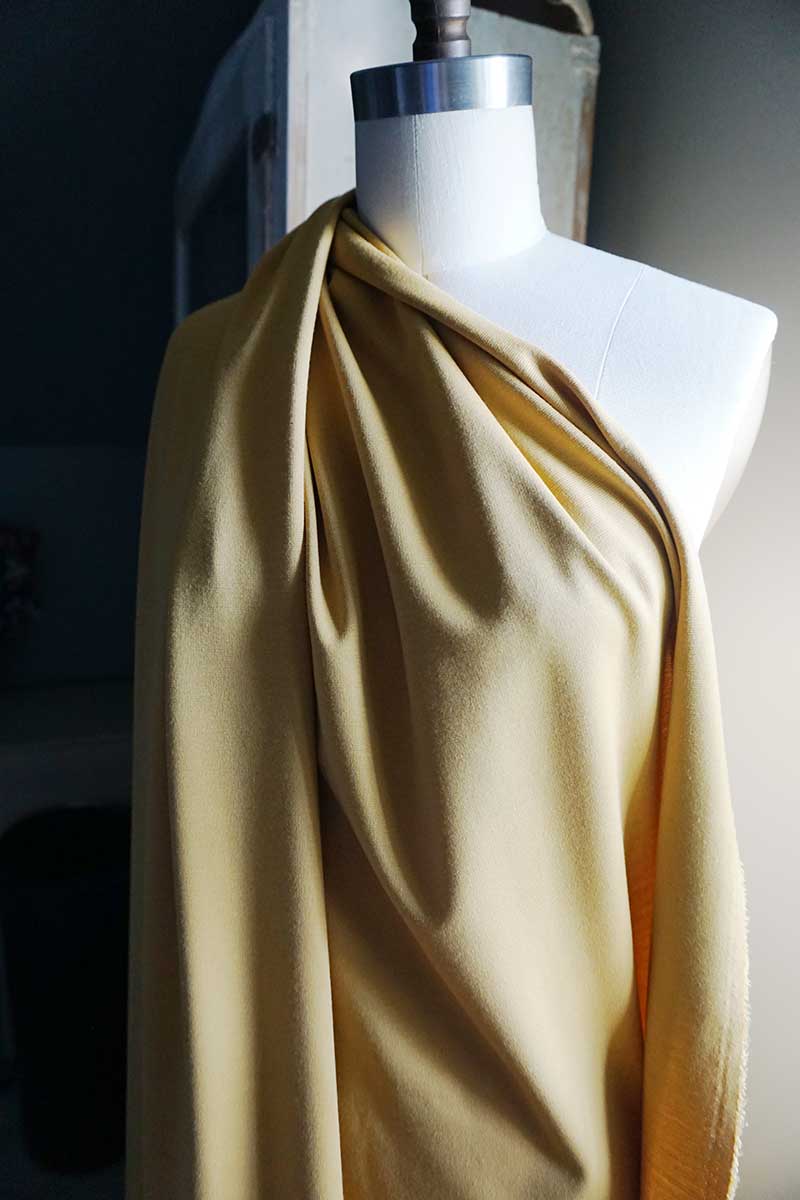 [Mustard Yellow Ponte De Roma Solid]
 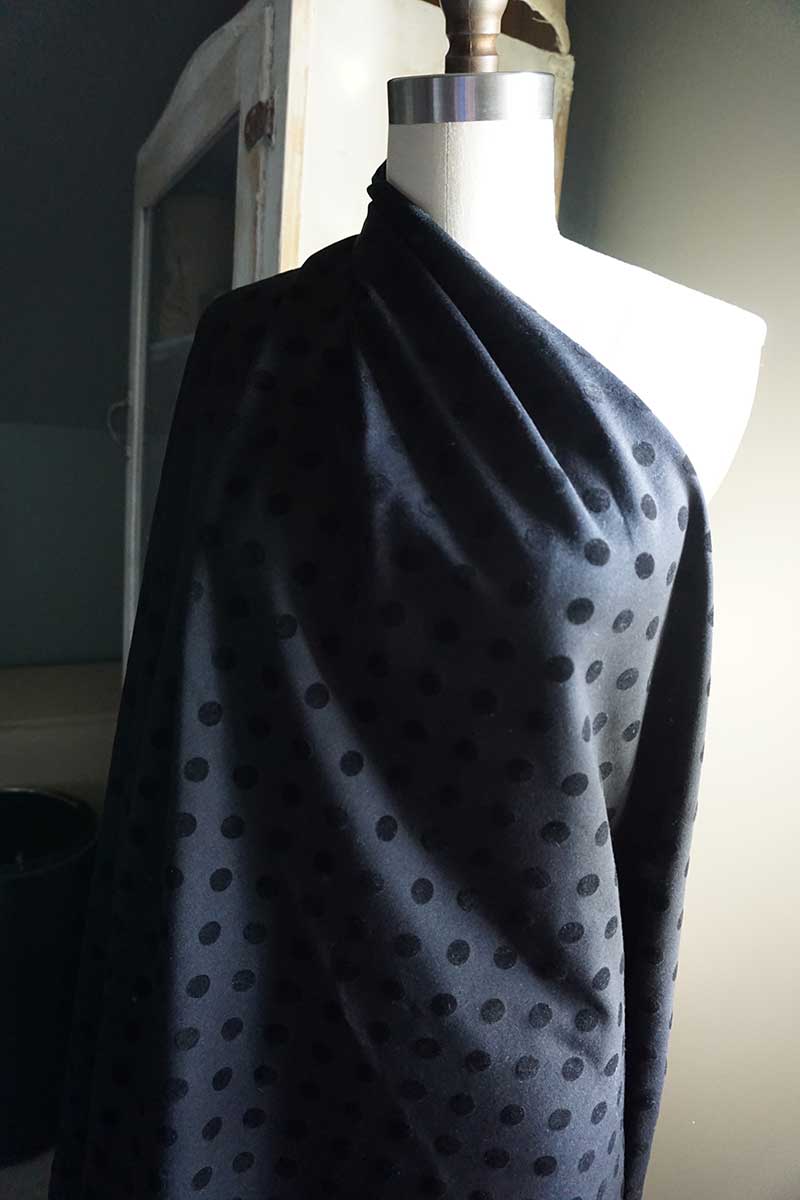 [Ponte De Roma Black Velour Dot] And here is my plan for all these luscious fabrics!
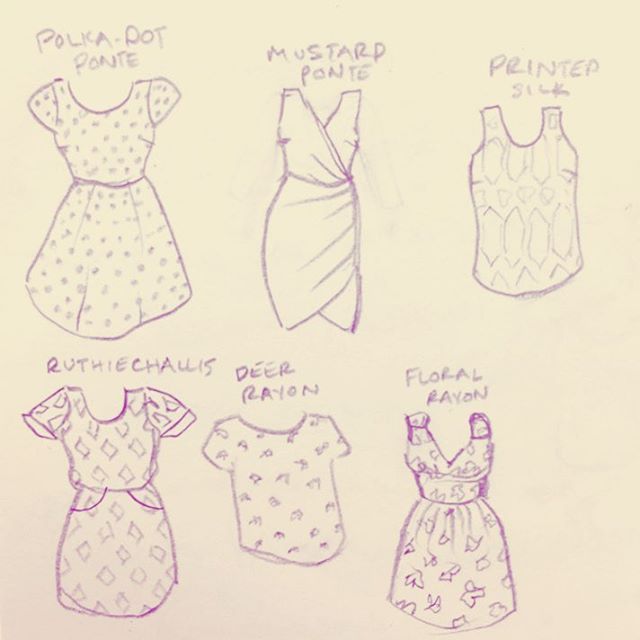
A Skirt and Some Buttons
in Projects
After working the booth at Italianfest all weekend, I was eager to get some "me" time and do some sewing. I picked up a remnant this morning at JoAnn Fabrics. It's a beautiful white eyelet with a paisley pattern.There was a yard left, and I snatched it up to make a skirt. The one yard was a little short (and see through) so I cut it in half horizontally and used some muslin I had lying around to line it.I forgot the camera for the first part of the process, but basically I cut each piece of fabric horizontally to make four 20" x about 60" (two of the muslin and two of the eyelet.) I sewed the short ends of the two muslin pieces and did the same with the eyelet pieces to make two wide tubes. Then I sewed the tops of the tubes together with wrong sides facing out.Next step is hemming. I actually took pictures of this! Just fold and iron the hem down twice.
 After you've hemmed, sew a tube along the top of the skirt (making sure your elastic will fit) and leave an opening to push the elastic through.


 Attach a safety pin to both ends: pin one to the end of the tube so it doesn't slip through. Use to other one on the other end of the elastic to push it through the tube at the top of the skirt.
 Sew the ends of the elastic together and close up the tube. You're done!
 And, as an added bonus I made some fabric covered buttons!


 Enjoy!