How to go from this...
[responsive]
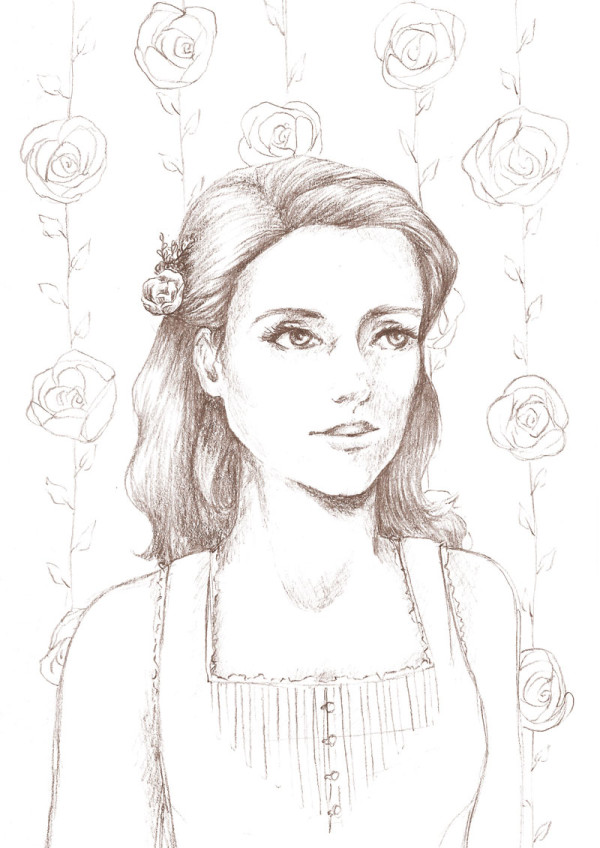
[/responsive]
To this!
[responsive]

[/responsive][responsive]
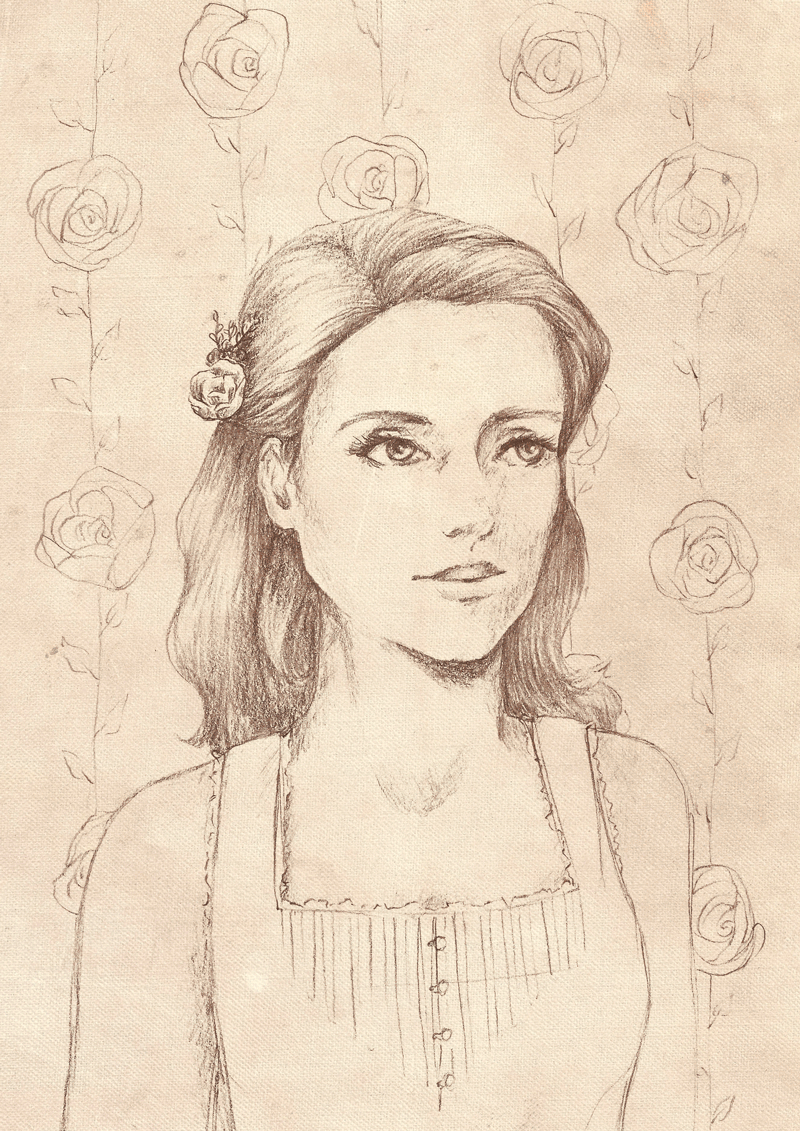
[/responsive]Step 1. Scan in your drawing (I like to set the scanner to 300 dpi grayscale TIFF) and bring it in to Photoshop. Unlock the layer and clean up any areas you need to. I like to just use a round brush with white paint to do this. Command-U to adjust the linework color. Check "Colorize" and adjust the sliders to your liking. Don't mess with the lightness slider at this point. If you want to make your linework darker you can adjust the curves. Set your layer style to "Multiply"2. Find a sepia-colored paper texture and place it in a layer below the sketch layer. Set the layer style to "Multiply" and the opacity to around 50%. Keep this layer directly under your sketch layer.3. Make a new layer and choose a background color. Always keep this layer beneath all the other layers you'll end up with.4. Start adding new layers under the textured paper layer. I like to separate these by color. I used a sort of dry texture brush that uses the background and foreground colors together depending on pen pressure. I also used a Wacom tablet, though this isn't really necessary. Keep your color layers separate and stack them as needed. That way, you can go back and change the opacity of certain sections.5. Lastly, to add a little more depth to the image, I used filter > render > lighting effects to add a vignette effect on a layer above all the other ones. I made a layer of white, applied the effect and set the layer style to "Multiply". You can probably see by now that the multiply style is super helpful :)Additional tips: I like to use the hue/saturation tool to adjust the colors of my layers. Dodge and burn are also helpful for adding more depth to certain areas. This technique is by no means polished, but I think the overall look is quite nice.Hope you liked seeing the process!